Guided Access helps students with disabilities such as autism remain on task and focused on content. It allows a parent, teacher, or administrator to limit an iOS device to one app by disabling the Home button, as well as restrict touch input on certain areas of the screen. - Apple
Guided Access, one of many new features found in iOS 6, allows you to put your device in Kiosk mode, limiting access to other apps on the device. This feature can be useful for secure testing, keeping students on task, and more. In this post, we'll take a look at how to setup and use Guided Access on your device to limit access to a specific book in the iBooks app.

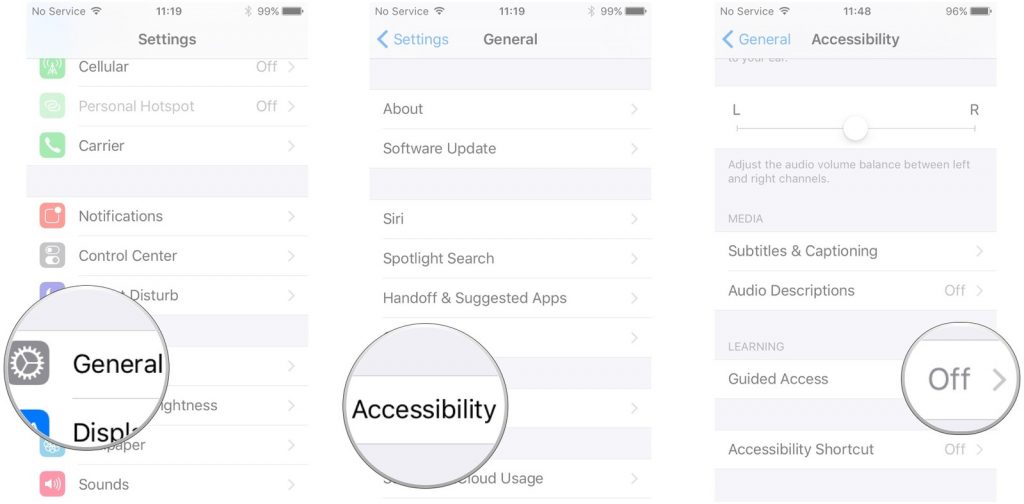
- Access the Settings app. Then, tap General | Accessibility | Guided Access.
- Use the slider at the top of the screen to turn on the service.
- Tap Set Passcode. You'll need to remember the passcode you set here to exit Guided Access mode later on.
- Launch the iBooks app (or any other app of your choice).
- Triple-tap the Home button. Once the Guided Access screen loads, use your finger to draw circles around the parts of the interface that you don't want to students to be able to access. Since we're limiting access to a specific book, we remove access to the Library button.
- Tap the Start button to launch Guided Access.
That's all there is to it! Once finished, simply triple-tap the Home button and enter the passcode to exit Guided Access mode. As you can see, there are all sorts of potential use cases for this feature in classrooms and labs.
